| 1. | On the project screen, click the LCMS Menu button to expand the drop-down menu. |
| 2. | On the expanded drop-down menu, click the Glossary option to open the Glossary screen. |
| 3. | On the Glossary screen, click the Add Glossary Term button to open the Add Glossary Term screen. |

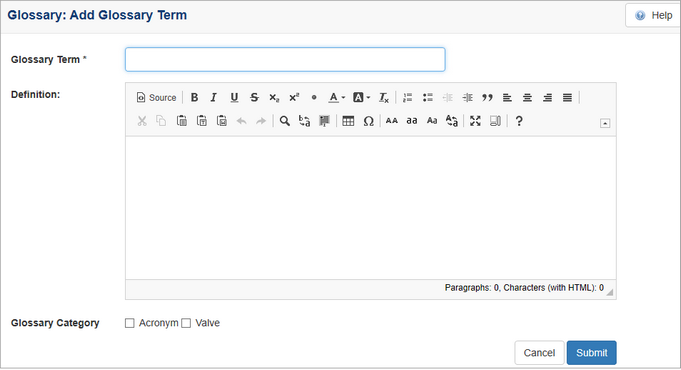
| 4. | On the Add Glossary Term screen, enter the desired glossary term in the Glossary Term field. Note: If Multilingual Support is enabled, the alternate language term and definition fields display. |
| 5. | Enter the desired definition for the glossary term in the Definition field. |
| 6. | Click the checkbox beside each Glossary Category you wish to assign to the term. |
| 7. | Click the Submit button to save the changes or click the Cancel button to return to the previous screen. The glossary term will now be added to the selected category(ies). |
Note: Glossary links can be turned on or off for the following areas of courseware:
If the terms added to the glossary are from within these areas, the terms in the glossary have to match exactly with these terms in the lesson. They have to be the same case, context, one word, two words, etc. for the links to be created properly when exporting content. You do not have to add plural forms of terms to the glossary as the LCMS will automatically pick these up when creating linkage. Glossary links can also be configured to only link up to the first occurrence of the glossary term, rather than all instances of the term, on every screen within all the applicable areas (main text, instructor notes, etc.).
|


