|
Once you have added a project to the LCMS, you must assign users who will have rights to the project. Administrator is a sitewide role. In addition, there are several system-generated user roles for projects:
Note: It is possible to assign one user to more than one role in a project. In this case, they will be presented with a drop-down menu from which to select their chosen role when entering the project from the home screen. Assigning the user to multiple roles or projects does not change the seat count for the license. One user equals one license.
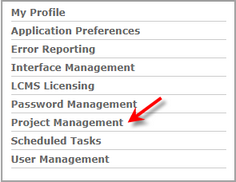
| 1. | On the LCMS Home screen, click the Project Management link to open the Project Management screen. |

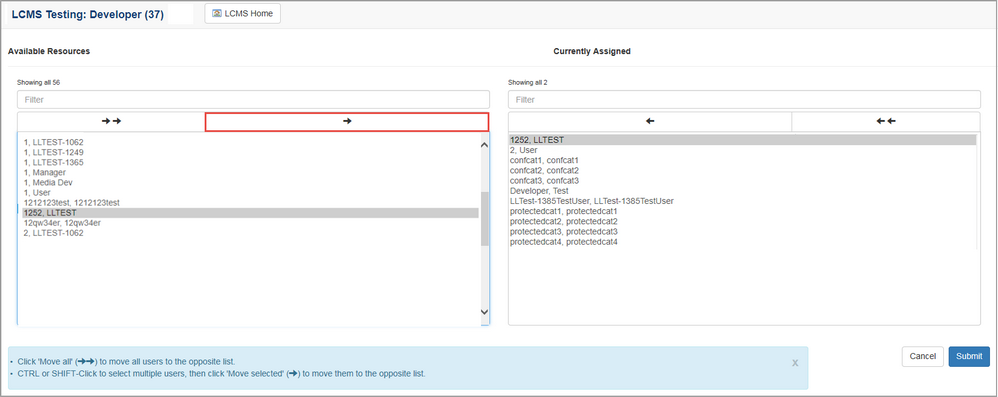
| 2. | On the Project Management screen, click the links for the rights you wish to assign. For example, to assign Developer rights to a project, click the Developer link. A new window opens listing all users assigned to the LCMS. Resource names are listed alphabetically by last name, first name. Use the Filter field to type in a user's name to speed up your search. |

| 3. | Select the name or names of the users in the Available Resources column that you would like to add to the project. Click the right arrow button to move the name(s) to the Currently Assigned column. To remove a user from the Currently Assigned column, select the user and click the left arrow button to move the name back. |

| 4. | Click the  button. The selected users are now assigned Developer rights to the project. Note: You can assign or remove all users at one time by simply clicking the left or right double arrow buttons. button. The selected users are now assigned Developer rights to the project. Note: You can assign or remove all users at one time by simply clicking the left or right double arrow buttons. |
| 5. | Repeat steps 1 – 5 to assign the required users to the project. Note: To manage the review/approve activities process within the LCMS, a Reviewer or Review Manager and Approval Authority must be assigned to the project. |
|