| 1. | To add a media asset, click the Add Media button at the top left of the Media Library window. |

| 2. | On the Add Media screen, click the Browse button, then locate the media asset you wish to upload. Alternatively, you may drag and drop the desired media asset to the designated area on the screen. |

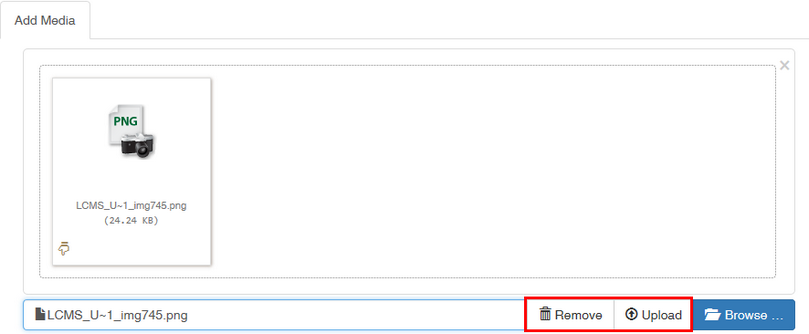
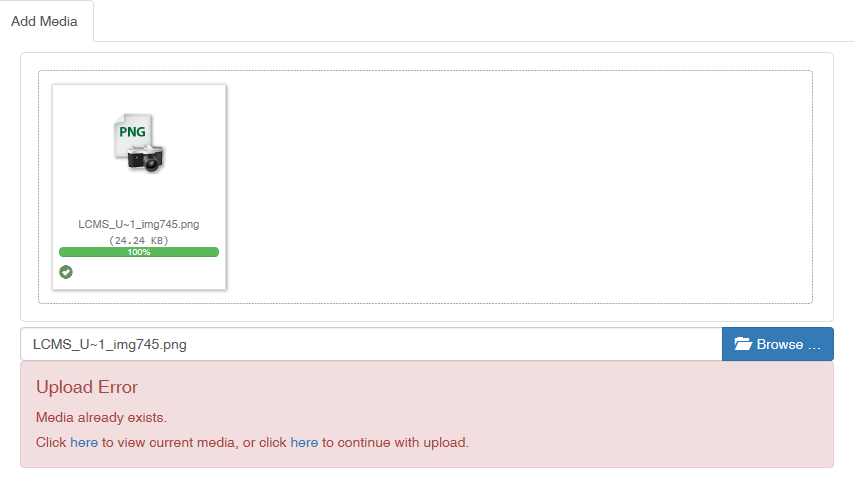
| 3. | Click the Upload button to upload the desired media asset or the Remove button to return to the previous screen. Note: When the media asset you have uploaded already exists, you will receive an Upload Error message. |
| 4. | On the Upload Error message, you may select the "click here to view current media" option to update the exiting media asset or select the "click here to create a new copy" option to create a new copy of the media asset. |
To update a current media asset:
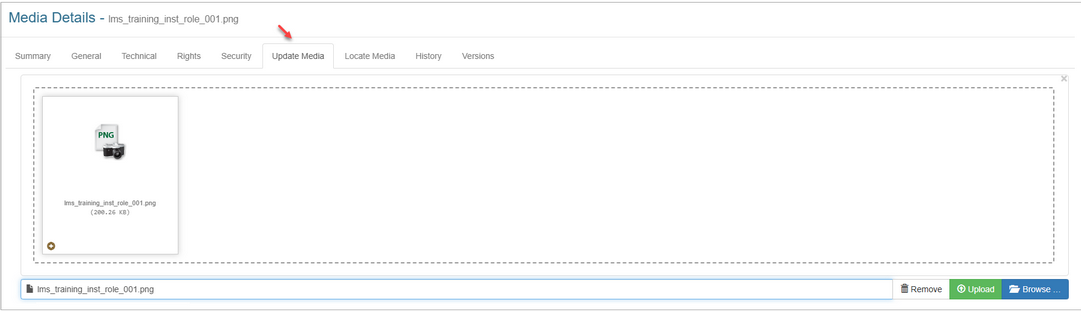
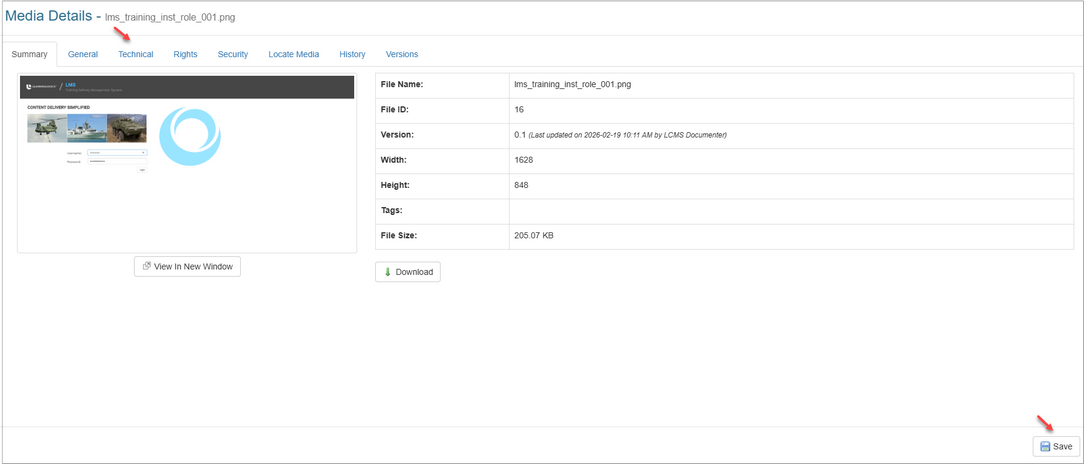
| 5. | On the Upload Error message, click the here link in the click here to view current media message to open the media asset's Media Details screen. |
| 6. | On the Media Details screen, modify the information in the General, Technical, Rights and Security tabs, if required. |
| 7. | Click the Save button the save the changes. |
| 8. | Click the Update Media button to open the Update Media screen. |

| 9. | On the Update Media tab, click the Browse button, then locate the media asset you wish to upload. |
| 10. | Click the Upload button to upload the desired media asset. The desired media asset will upload to the Media Library. The version number for the media asset will also increase by the value set in the Project Preferences Versioning tab. |

To create a new copy:
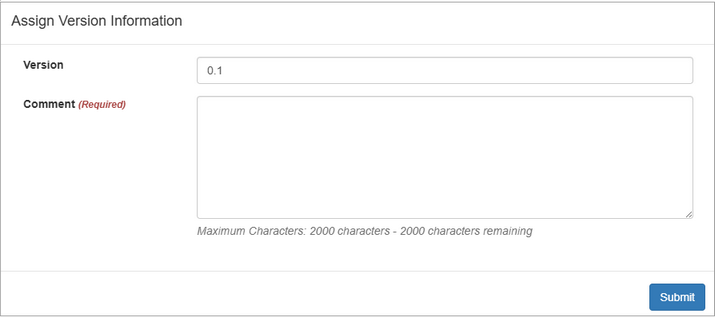
| 11. | On the Upload Error message, click the here link in the click here to create a new copy message to upload the media asset. Note: When the media asset is uploaded, the Assign Version Information window will open. |
| 12. | On the Assign Version Information window, enter the desired version number in the Version field. Note: This field will be greyed out when the Allow Version Number to be overridden feature is not enabled in the Project Preferences Versioning tab. |
| 13. | Enter the desired reason for the version change in the Comment field, if required. Note: This field is a required field when the Require comment on update feature is enabled in the Project Preferences Versioning tab. It is an optional field when the Require comment on update feature is disabled. |
| 14. | Click the Submit button to open the media asset's Media Details screen. |
| 15. | On the Media Details screen, modify the information in the General, Technical, Rights and Security tabs, if required. You may also push this version of the media asset to all locations. See Versions for more information. |
| 16. | Click the Save button the save the changes. |
|