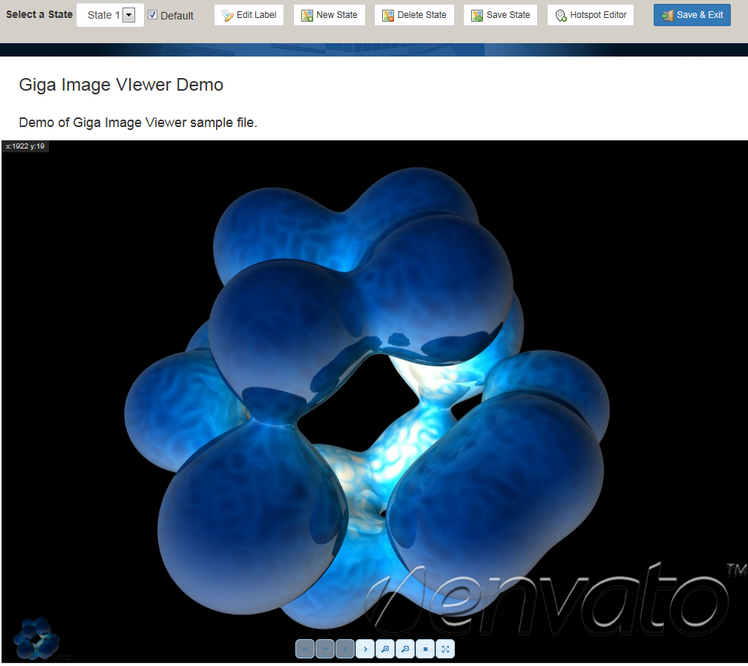
| 1. | Click the Settings button in the Media tab to configure the states of a Giga Image Viewer file for the current screen. The Giga Image Viewer states are configured using the navigation buttons at the bottom of the preview and other controls. |

| 2. | Click the name of a state to select it from the drop-down labeled Select a State. |
| 3. | Click the Delete State button to remove a state. |
| 4. | Click the New State button to create a state. |
| 5. | Click the Edit Label button end enter a new value to change the name of a state. |
| 6. | Click the Default checkbox to toggle whether the currently-selected state is the one that will be shown first, by default, in the viewer. |
| 7. | Zoom in and out using the scroll wheel (if you have one) on your mouse, or click on the magnifying glass icons to zoom in and out in stages. |
| 8. | Click and hold down the mouse-button on the arrow buttons to pan up, down, left, or right. |
| 9. | Click the dot button to zoom as far out as possible, or the crosshair button to zoom as far in as possible. |
| 10. | Click the mouse button and hold to drag the image around the viewport. |
| 11. | Double-click part of the image to center the viewport on it. |
| 12. | Click the thumbnail in the bottom-right corner of the preview, to move around the viewport. |
| 13. | Click the Hotspot Editor button to open a new dialogue box in a pop-up window that will allow you to edit hotspots and create states for hotspots in the Giga Image Viewer. |
| 14. | Click the Save State button to save a state. Note: It's important to save a state before switching to view another state or leaving this editing screen, otherwise you may lose your changes. |
| 15. | Click the Save & Exit button to save your changes and return to the LCMS screen editing screens or click the Close icon in the top-right of the browser window to exit without saving. |
This is an optional feature. For more information, please contact learninglogics-support@bluedrop.com.
|