|
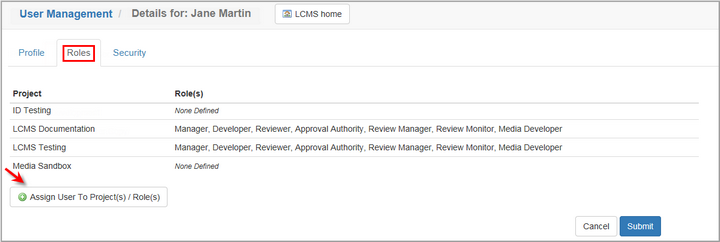
Administrators can now easily see which project(s) a user is assigned to, as well as the role(s) the user has within the project.
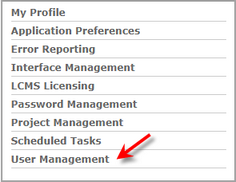
| 1. | Click the User Management link on the LCMS Home screen to open the User Management screen. |

| 2. | On the User Management screen, click the Users tab to display the User list. |
| 3. | On the User list, click the desired user to open the User Details screen. |
| 4. | On the User Details screen, click the Roles tab to view a list of the projects the user is assigned to and their assigned role(s) on each project. |

| 5. | Click the Assign User to Project(s) / Role(s) button to modify this list, if required. |
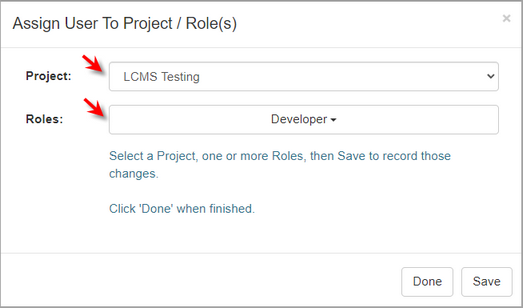
| 6. | On the Assign User To Project / Role(s) window, select the desired project from the Project drop-down menu. |
| 7. | Select the desired role from the Roles drop-down menu. |
| 8. | Click the Save button to save the changes. |
| 9. | Click the Done button to close the Assign User To Project / Role(s) window and return to the Roles tab. |

| 10. | On the Roles tab, click the Submit button to save the changes or click the Cancel button to return to the previous screen. |
|