|
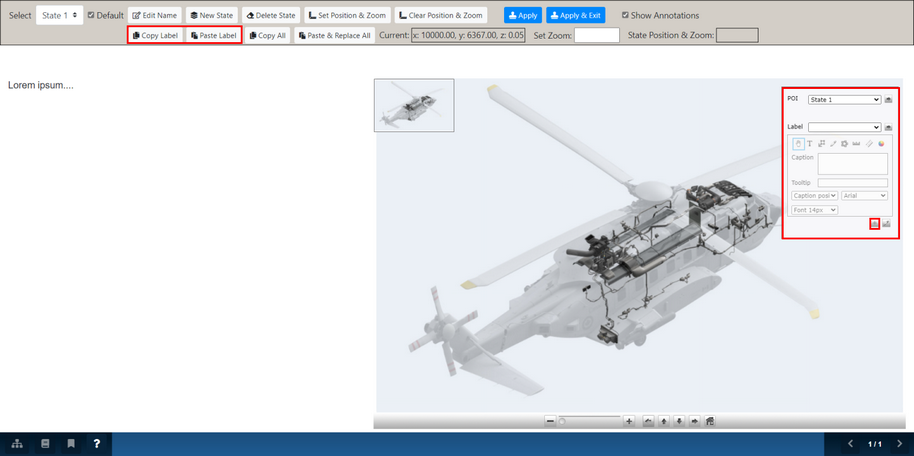
On the Settings screen, the Show Annotations checkbox is selected by default to display the Annotations panel. Deselect the checkbox to hide the panel.
The Zoomify Annotations panel allows you to customize each state with labels and captions.

| 1. | Click the + button at the bottom of the panel to enable the following label options: Image Navigation, Toggle Color Palette, Freehand Drawings, Text Labels, Icon Labels, Rectangle Labels, Polygon Labels and Measurements. |
| 2. | To add a text label, click anywhere on the image to make the label appear. Click in the Caption field to edit the text within the label. Note: Creating text labels at various zoom levels results in varying sizes of text labels. When text labels all need to appear the same size, select the desired zoom level, and then create the text labels. When adding text labels to an existing Zoomify, verify the zoom level and then create the text label. |
| 3. | For shapes and drawings, you can customize the way you would like them to appear on the image. You can also customize the caption and use the drop-down menu to choose the position in relation to the shape. |
| 4. | Once you are satisfied with your label or highlight, click the Save button at the bottom right of the panel. |
| 5. | Click the Copy Label button, and then the Paste Label button to copy and paste a label from one state to another. |
|