|
The E-Mail templates provide customized or standardized messages to send to the users for various notifications such as overdue notices.
| 1. | On the LCMS Home screen, click the Application Preferences link to open the Application Preferences screen. |
| 2. | On the Application Preferences screen, click the E-Mail Templates tab from the Components menu to open the E-Mail Templates pane. |
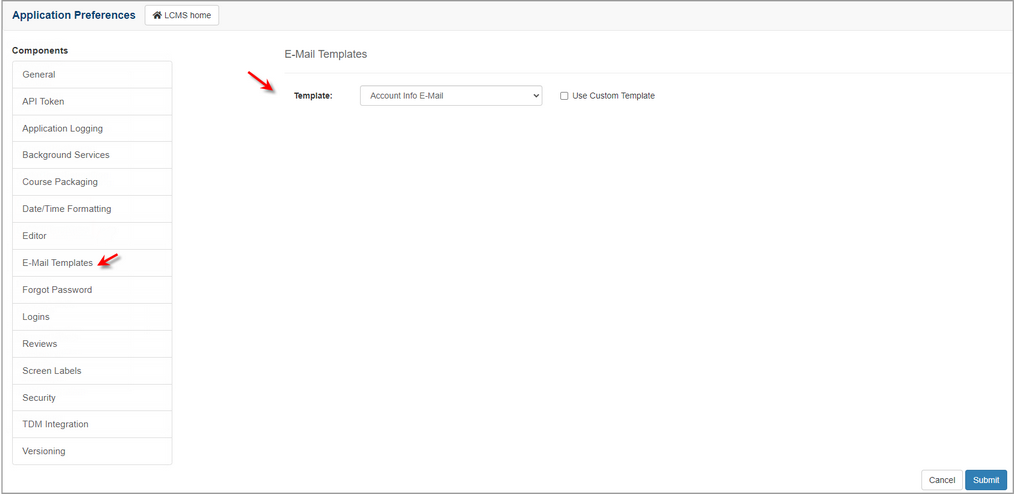
| 3. | On the E-Mail Templates pane, select the desired email Template from the drop-down menu. Note: The templates in the drop-down menu are LCMS defaults. |
| 4. | To create a custom template, click the Use Custom Template checkbox and enter the desired information in each field. Note: Any templates created will override the templates used by the LCMS. To continue to use the LCMS defaults, leave the Use Custom Template checkbox deselected. |
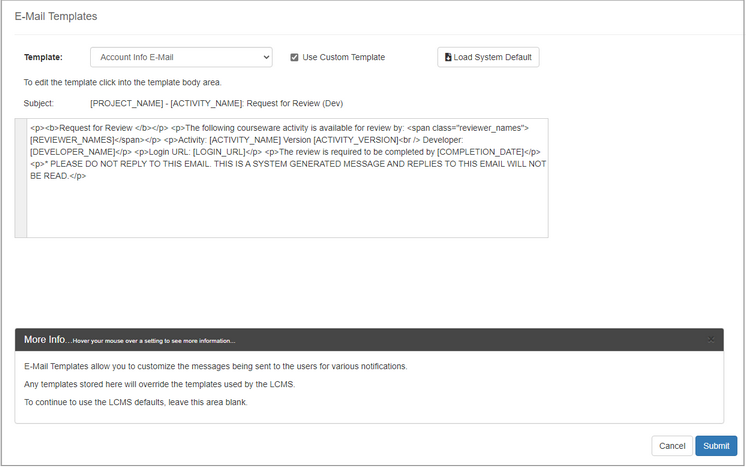
| 5. | To edit the Template, select the desired template from the drop-down menu. |
| 6. | Click the Load System Default button and modify the text in the text field. Note: Insert template dynamic variables into the text body by clicking the text body window, and then the Insert Dynamic Variable drop-down menu in the toolbar. For the Subject, type the variable name inside [square brackets]. |
| 7. | On the E-Mail Templates pane, click the  button to save the changes or click the button to save the changes or click the  button to return to the previous screen without saving. button to return to the previous screen without saving. |
|