Thumbnail
|
Description
|

|
3.17 Swappable Media. Click on either Text Options or hyperlinks to switch between up to fifteen media assets. Media selected replaces the default asset in the left-hand pane. If the file name is left blank, the caption text will fill the available space in the media area. Optionally, collapsible text underneath each Text Option can also be displayed when it is selected.
|
This screen style displays a list of Text Options which the user can click to display corresponding media assets. There is also the option of adding Collapsible Text that will reveal beneath each Text Option when it is clicked.
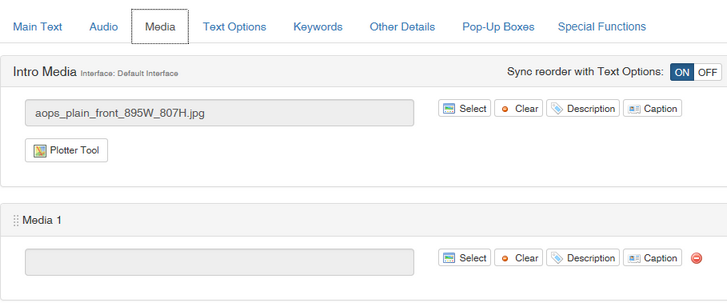
| 1. | In addition to the standard fields, including Main Text, this screen has a Media tab that contains Intro Media and multiple Media fields, numbered one to fifteen. To reorder Media fields, use the drag-handles (top-left of field). Be sure the Sync reorder with Text Options toggle is ON, if you wish to reorder the associated text options at the same time. To remove a media asset, click the Remove Graphic icon. To add more media, click the Add Graphic button. Note: The Media tab is disabled when the "100% Text, No Media" option is chosen. |

Note: The Plotter Tool is also available for use with the Default Graphic. See The Plotter Tool for more information. If you wish to have the same caption for all media on this screen, click the Apply to all Media checkbox in the Intro Media Caption field.
| 2. | These fields function in the same way as the Media fields in the basic screen styles described earlier. However, the media will be displayed on the right-side of the viewer and change based on user interaction. |
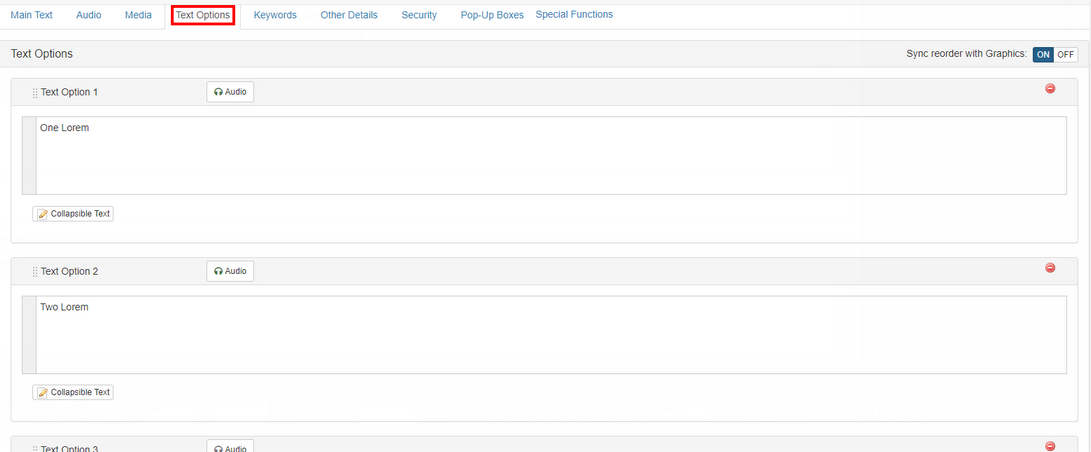
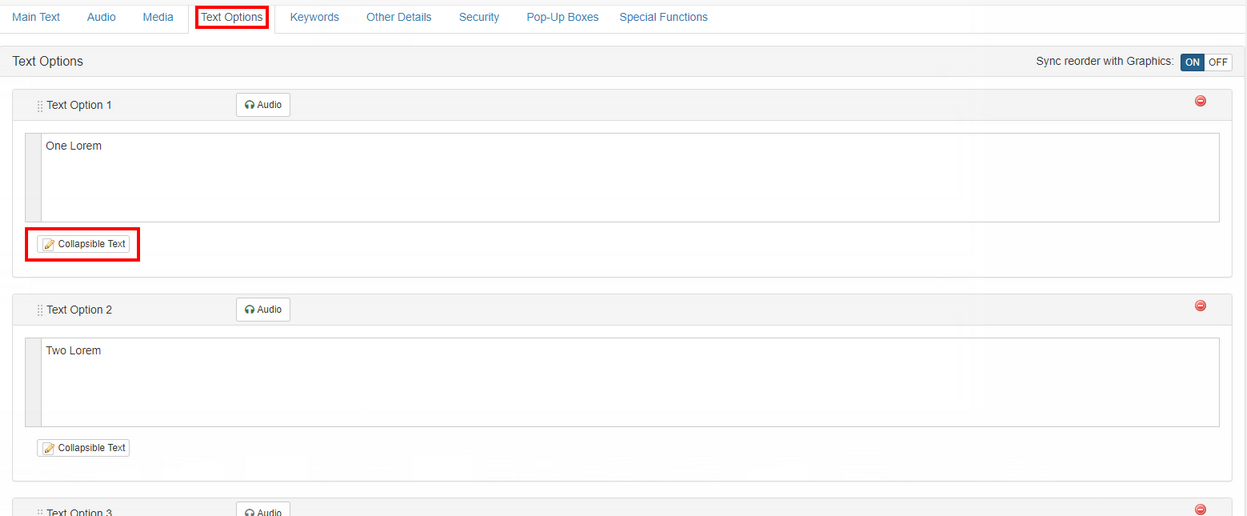
| 3. | This screen style also has a Text Options tab, with multiple numbered fields, which is used to define the text displayed as interactive bullets on the left side of the viewer. These fields correspond with the Media fields of the same number (i.e., Text Option 1 corresponds with Media 1). Note: The Media tab is disabled when the 100% Text, No Media options is selected. You may also click the Audio icon to enter an audio file in each Text Option field. The Text Option field may contain both text and audio. If no text accompanies the audio file, the play button displays. Note: Click the Add Text Option button to add more Text Options, up to a maximum of fifteen. HTML tags can be inserted into the Text Options field, to format text. To reorder Text Options fields, use the drag-handles on the top-left of the Text Option field. To reorder the associated media at the same time as the Text Options, be sure the Sync reorder with Graphics toggle is ON. To remove a text option, click the Remove Text Option Icon. Note: Deleting a Text Option does not delete its corresponding graphic. Graphics must be deleted separately. |

| 4. | Click the Collapsible Text button to display an HTML editor field, which you can use to add optional hidden text, to be displayed when the corresponding Text Option is clicked. You can also create hyperlinks within Collapsible Text that activate changes in the media (i.e., swapping out the current image for the linked image). See Add New Hyperlink for more information. |

| 5. | When previewing this screen style, Main Text and Text Options are on the left and the Default Graphic is on the right. Clicking a Text Options swaps the media on the right, replacing the Default Graphic with the graphic that corresponds to the selected Text Option. Note: When "100% Text, No Media" is chosen as the layout, the text will fill the screen. |
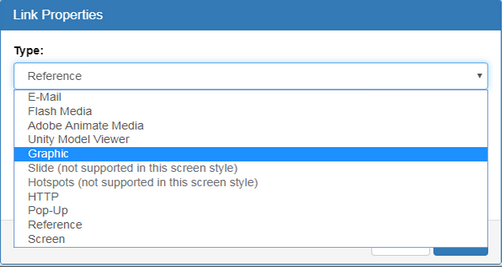
Note: Hyperlinks can also be added to the Main Text area to activate changes in the media (e.g., swapping out the current image for the linked image). Click the Link icon at the top of the Main Text window and follow the same procedure. Note: Links to swap media is currently supported only in the 3.17.

| 6. | Choose an option from the Type drop-down menu in the Link Properties window. See Add New Hyperlink for more information. |

|